Blogging Tutorial
This article will be updated on a regular basis based on your questions and feedback.
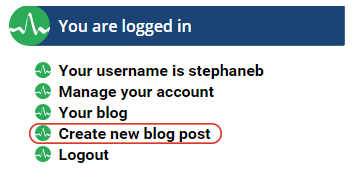
Creating a new blog post
- Make sure your are logged in
- Click on 'Create new blog post'
Although the online editor works pretty well and I suggest you experiment with it to see if you like it, chances are that if you blog often, you will encounter some frustrations with it. It is hard to predict what the source of the frustration(s) will be for you but what you will notice is that it isn't working as well as a desktop editor. If the article you are intending to write is just a few paragraphs of text, maybe with a few images, then the editor will probably do the job without a problem. But if your article has lots of pictures and equations and formatting, then you are better of creating your article with a desktop html editor first, then copy-pasting the html code into the source editor. To access the source editor, click on the <> button:
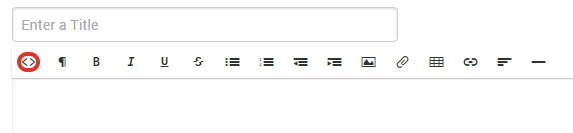
and paste your source code.
Always keep a local copy
Whatever you choose to use the online editor or not, always keep a local copy of your work. Saving your article in the database works and I do backup the database daily, but sometimes there are bugs in the system, especially when I make changes, and I don't want you to lose hours of work because of it. So again, always keep a local copy of your work.
Use basic html - do not use Word!
Only basic html tags should be used when writing your articles. I ask that you do not try to change things like the fonts (type, default sizes, etc), line spacing, etc, or new CSS rules. If you use the online editor, this won't be a concern. But if you try to write your articles with Word (I strongly discourage that road) for instance and then export the article as html, it will create a very complex html source code with all kinds of tags that will conflict with the CSS rules in place.
Previewing your work
What you see in the editor is not exactly how your article will look like when published. As soon as you first save an article that you are working on, a preview becomes available. To access it, I would suggest you open a new browser window or tab and from that new window/tab, click on 'Your blog':
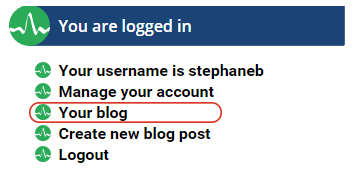
you should see all your articles listed there, including the ones in progress. Just click on the title of the article you are working on and you will be showed a preview. After that, all you have to do is 'refresh' to preview modifications as you save them in the editor.
Equations
The site uses Mathjax to display equations written in TeX. This is the best way to make your equations look really good. A tutorial is available here. It may seem complicated but it is actually easy to learn. In no time, you will be fluent in TeX. Here's an example of how an equation looks with Mathjax:
$$ y'(n) = {{x(n) - x(n-2)} \over 2} . \tag {5} $$The TeX formula for this equation is:
y'(n) = {{x(n) - x(n-2)} \over 2} . \tag {5}
All I had to do to make this equation display was to enclose the TeX formula within two dollar signs on each side ($$):
$$ y'(n) = {{x(n) - x(n-2)} \over 2} . \tag {5} $$
If you want to 'inline' an equation, like this: $ {10 + 5} \over {5 + 10} $, all you have to do is surround your equation with only one dollar sign ($) on each side.
Code Highlighting
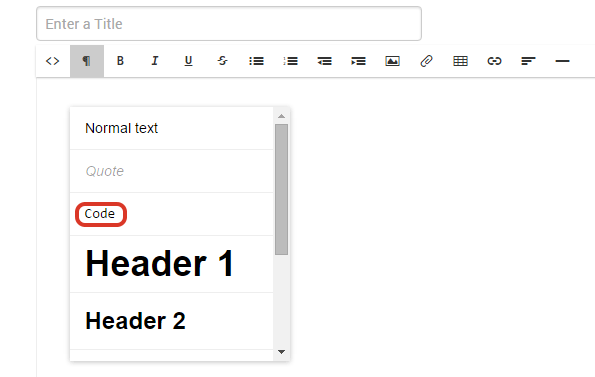
Code snippets are found often in the *related blogs. To have a code snippet highlighted, all you need to do is enclose it with the pre tags or you can select the code that you want to highlight and click on formatting->code:
Unfortunately, I am not fully happy with the current highlighter (highlight.js) that is used, although it is the best solution I could come up with so far. If you know of a better solution, please do not hesitate to get in touch.
Pictures & Images
Before you use an image into one of your articles, make sure to:
- resize the image so it fits perfectly in the article (max width: 700px)
- optimize the image so it looks sharp but uses the smallest amount of bytes.
For #2, if you have access to Photoshop, the PNG8 format (available through 'Save for Web') produces some spectacularly small files.
Once you have resized and optimized your images, there are a couple of ways you can go about to include them into your article.
- You can upload your images on images sharing websites like imgur or flickr and then include the images in your article through an img tag.
- Or you can simply 'drag and drop' an image into the editor (you drop it at the location where you want it in the article). This will upload the image on our server and will automatically add an img tag in the article. You can even resize the image if you want afterwards directly in the editor, although I strongly suggest to make the image the right size before you upload it.
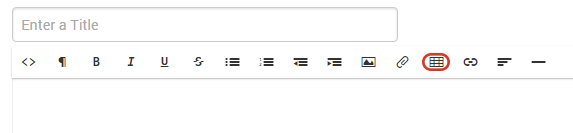
Tables
The editor allows you to create tables:
and although the table will often look fine in the editor, it might not be the case in the article itself. To solve this issue, you will need to access the html source code and play a little with the table tags. The first thing to try is to force a width. By default, the table code will look something like this:
<table>
<tbody>
<tr>
    <td>
    </td>
    <td>
    </td>
</tr>
</tbody>
</table>
You'll notice that there is no width specified in the table tag. By default, the editor will display a 100% width (it will use 100% of the available width) inside the editor, but in the preview, the width will be shrinked to the smallest width needed to fit the content. To change this behaviour, simply modify the table tag to something like:
<table width="100%">
if you want the table to use the full width of the blog box, or you can specify a smaller percentage or even a number of pixels.
Now, if you want your table to have borders around:
<table width="100%" border="1">
If you would like to learn more about html tables, I suggest this tutorial.
Editing, Deleting, Publishing...
In 'Your blog' section, you will notice the following icons attached to every blog post:
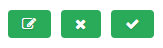
I think they are self-explanatory. The first one is edit, second one is delete and last one is publish.
Twitter, Youtube..
If you want to embed a tweet in your blog, you will have to paste the embed code that you got from Twitter into the 'source' of your blog. To do this, click on the source button '<>' and then paste the code where you want the video or tweet to be added.
Example of a tweet:
Great article by Tim Wescott: Data Types for Control & DSP - https://t.co/VT3d4wtUo3
— DSP Related (@dsprelated) April 27, 2016
If you want to embed a Youtube video, it is very simple. You can paste the embed code that you got from Youtube directly in the editor (no need to do it in the source code).
Example of a Youtube video:
Questions?
This is all I have for now. Please use the comments system bellow to send me your questions & comments, or you can contact me directly either through my email address (stephaneb@ the dsp related domain name) or by using the contact form.